Add a Tunnel Shape Template Position
Typically, at the time you create a tunnel shape template using the Create a Tunnel Template command, you specify a station along the tunnel corridor at which to apply it. If you did not specify a station at that time, or you want to specify additional stations at which to apply the template, you can use the Add Tunnel Template Position command, as described below. For example, you might want to start the tunnel with template_1, then switch to template_2 farther along the corridor, and then switch back to template_1.
 See important information on transitioning from one shape to another...
Prerequisites:
Licensed module. See the Subscription Plans page. For a license matrix by command, see the License page in the TBC Community. Also see View and manage licensed features.
To add a tunnel shape template position:
- Select Add Tunnel Template Position in Tunnels > Create to display the Add Tunnel Template Position command pane.
- Select the Tunnel and Tunnel template for which you want to add a position.
- In the Station field, enter the station at which you want to apply the selected tunnel shape template.
- Click OK.
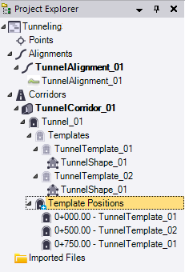
The following example shows that TunnelTemplate_01 is applied at two different stations, with TunnelTemplate_02 intervening.
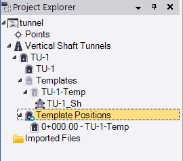
The following example shows a template position for a vertical shaft tunnel.
- If necessary, repeat this procedure to apply the selected tunnel shape template to additional stations along the tunnel corridor.
Note: After you add a tunnel template position, you can, if you want, select not to apply any of the tunnel shapes associated with the tunnel shape template at that position. To do so, right-click the tunnel template position in the Project Explorer and select Properties. Then, in the Properties pane, select No for any associated shape template you do not want to apply.
