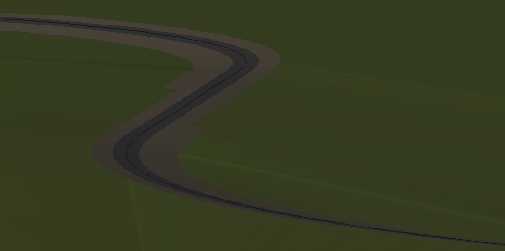
Add a Texture to a Surface Area
After you specify image files (or colors) to use as material textures, use the Add Surface Texture command to apply them to surface areas to make your 3D model more realistic. When you fill one or more areas of a surface with textures, it can help you visualize different surface materials in graphic views and printed output. For example, in a golf course design, you might want to fill fairways with a grass material texture and traps with a sand material texture. When you add a texture to a surface area, it spreads until it encounters a drapeline set as a 'texture boundary'. Textures can also be added to islands within holes in a surface.
Tip: Breaklines in corridor surfaces are automatically set as texture boundaries, so that you can easily add textures to medians, travel lanes, shoulders, and ditches.

Prerequisites:
- License; See the Subscription Plans page. For a license matrix by command, see the License page in the TBC Community. Also see View and manage licensed features.
- Materials for which you have specified texture images (or colors)
- Surface areas bounded by drapelines
To add a surface texture:
- Ensure that the area you want to fill with a texture is a closed area bounded by a connected series of breaklines or linestrings.
- In the Properties pane for each of the bounding lines, set the Surface sharpness property to Sharp and texture boundary.
Note: If you want a texture to spread to the outer edge of a surface, you do not need to apply the texture boundary property to the edge.
- In the Properties pane for the surface, ensure that the Shading property is set to By material for each graphic view in which you want to see the texture. If you have no texture image specified, the material color displays on the surface. If you have no material applied, the default surface color displays.
- Select Add Surface Texture in Surfaces > Create.
- Select the surface that you want to add the texture to in the Surface list.
- In the Name box, type a unique identifier for the texture's location point as you want it to appear in the in the Selection Explorer and Properties pane. You can also use the name to select the texture in the Advanced Select command.
- Select the layer on which you want the texture to reside in the Layer list, or select <<New Layer>> to create a new layer for it. The color of the layer does not affect the texture color.
- Select the material whose texture image (or color) you want to apply to the surface in the Material list, or select <<New material>> to open the Material and Site Improvement Manager where you can create a new material or edit an existing.
Note: If you set the texture (or leave it set) to None, you are effectively applying a transparent texture/creating a hole in the surface. If the surface has no texture boundaries, it will become entirely invisible.
Note: For more information on how encompassed and overlapping areas affect each other, see Understanding Holes, Islands, and Overlapping Areas. - Click in the Texture location box, and pick a point in the Plan View within the area that you want the texture to fill. A surface texture indicator (+ sign) appears at the location.
- Click Close.
- If you added the texture to a takeoff surface, or if the Rebuild property for the surface is set to By user, click the Rebuild icon on the toolbar to rebuild the surface.
Tip: For any surface area, you can quickly switch between any of the materials used on the surface by selecting the texture location point and changing its material in the Properties pane.
Options:
- Name - A name for the texture location ('seed point') is optional, but recommended to help you find the texture in other commands.
- Texture location - In this coordinate control, specify the point from which the texture (or color) will spread until it reaches a texture boundary.
Scenarios:
- If your surface does not have any lines identified as 'texture boundaries', the texture or color will spread to the edges of the surface.
- If you apply a material texture image to a corridor, the repeated image is correctly aligned along the horizontal alignment. If you then drape an image over the corridor, however, the draped image is incorrectly aligned and repeated in the same manner as a texture image. To avoid this undesirable visual effect, use only a material texture or a draped image (not both) for a corridor surface.