Digitize a Linestring
Digitize a multi-segment line with one or more elevations by streaming points (adding points as you hold down the digitizer button and move the puck, and releasing the button at the end point). For simpler linestrings, you can simply pick individual points.
This command is optimized for digitizer input; you can enter multiple elevations for each linestring from the digitizer puck before and between streaming points without returning to the on-screen command pane. After you set up your digitizer, this feature enables you to quickly and simply digitize multiple linestrings using the Workflow for digitizing multiple linestrings at the end of this topic.
Note: Use hotkeys to change a segment type when you digitize a line, linestring, or contour. The following hotkeys are available:
s - Change the segment type to straight.
a - Change the segment type to best fit arc.
d - Changes the segment type to smooth curve.
x - Delete the last segment.
To digitize a linestring:
- Select Digitize Linestring in Takeoff > Digitize.
The Digitize Linestring command pane displays.
- In the Name box, type an identifier for the linestring as you want it to appear in the Selection Explorer and graphic views. You can also use the name to select the linestring in the Advanced Select command.
- Select the layer on which you want the linestring to reside in the Layer list, or select <<New Layer>> to create a new layer for the linestring.
- To have the first point and the last point in the linestring automatically connected by a segment when you finish streaming the points, check the Close by connecting ends if ends are close box.
Note: The tolerance for connecting ends is 2 mm (~1/10th of an inch) on the digitizer pad, depending on your project units.
- Specify the elevation to be applied to the linestring's first point in the Elevation box.
- Select a Filter type below the Next points box:
- Circle - In the Radius box, specify the minimum radial distance from the last point that the next point can be added.
- Tube - In the Length and Width boxes, specify the minimum rectangular distance from the last point that the next point can be added. This is not a 3D filter.
Tip: Start with a filter radius/length of 3 feet/1 meter. Then adjust the tolerance up or down depending on your needs.
Note: If you start a new linestring, the same filter settings are used until you change them.
- Click in the Next points box.
- Pick the first point for the linestring on the paper plans with your puck, hold down the digitizer button, and move along the path to the next point with a known elevation. Points are created along the linestring at a regular interval, based on the tolerance set in Filter Settings.
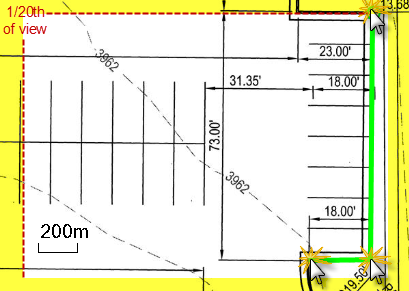
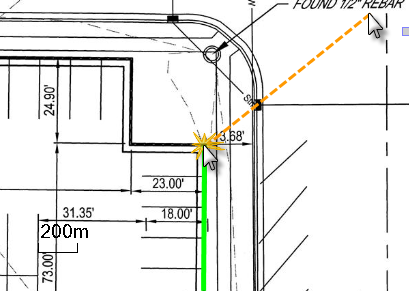
Note: If you digitize a point near the edge of the Plan View (1/20th of the view's height or width), the view will automatically pan (auto-pan) your last point to the middle when you release the mouse button. You can control the auto-pan settings in Options > Digitzer.
- While in the Next points box, type the new elevation for the last point streamed on the digitizer puck.
- Restart streaming points, and at the end of the linestring, release the button.
- Specify the elevation of the last point, if necessary.
Note: The elevation that you specify before starting a linestring is applied to the first point you pick. Each subsequent elevation that you specify is applied to the last point that was streamed. Elevations for the streamed points between specified elevations are interpolated.
Note: While in the Next points box, you can press [Backspace] to undo the last segment that was created. - Press [Enter] or click New to start a new linestring.
- Click Close when you are done.
Workflow for digitizing multiple linestrings:
- Set up the common name and layer properties for the linestrings you want to digitize.
- Specify the elevation of the first point on the first linestring.
- Choose the filter type and tolerances to use.
- Stream from the first point of the linestring to the next point with a known elevation, and release the digitizer button.
- While still in the Next points box, type the new elevation on the puck's keypad.
- Stream the remainder of the linestring, stopping to specify new elevations, as needed.
- Press [Enter] to start a new linestring and repeat steps 5 and 6 to digitize additional linestrings.
