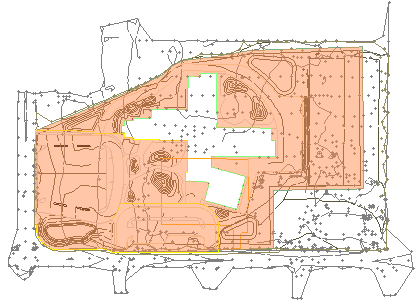
Define Areas of Interest
Define areas of interest (AOIs) to calculate material volumes and site improvement quantities for portions of your job site. AOIs, which might (for example) cover different phases of construction, can be defined by one or more closed lines serving as boundaries that establish the AOI’s area of coverage. These lines can be selected from existing line objects or digitized as polylines within this command. AOIs composed of multiple boundaries support the formation of holes and islands within the resulting area of coverage, which is shaded when you run this command so you can see which areas each AOI includes. The Takeoff Report will list the quantities associated with each AOI individually and then provide the total found within all included AOIs.
This command is optimized for digitizer input; you can digitize new AOI boundaries without leaving the command. To quickly and simply digitize multiple AOI polylines, use the Workflow for digitizing multiple polylines at the end of the Create a Polyline topic.
Note: If you are defining an AOI for the Create Mass Haul Analysis command, it should ideally contain at least two closed polylines; one should define an area of cut and the other should define an area of fill.
Prerequisites:
- Licensed module; See the Subscription Plans page. For a license matrix by command, see the License page in the TBC Community. Also see View and manage licensed features.
- Lines, each forming an enclosed area
To create an AOI boundary based on an area-based site improvement:
To access the command:
- Select Define Areas of Interest in Takeoff > Site Improvements.
The Define Areas of Interest command pane displays.
To define an area of interest from existing lines:
- Review any existing AOIs by clicking each name in the Areas of Interest list to shade the AOI in the Plan View. The number of closed boundaries that are associated with each AOI is also listed.
- Click Create. The Create Area of Interest dialog displays.
- In the Name box, type a unique identifier for the AOI as you want it to appear in the Selection Explorer and the Takeoff Report. Click OK.
Tip: You can rename an AOI by double-clicking its name in the Areas of Interest list.
- To digitize new lines for the AOI boundary, scroll down to the Digitize group. Otherwise, skip to step 11.
Note: If your digitizer is not connected, the Digitize group is collapsed.
- In the Name box, type an identifier for the AOI boundary as you want it to appear in the Selection Explorer and graphic views. You can also use the name to select the polyline in the Advanced Select command.
- Select the layer on which you want the polyline to reside in the Layer list, or select <<New Layer>> to create a new layer for the polyline.
- Select a Filter type below the Next points box:
- Circle - In the Radius box, specify the minimum radial distance from the last point that the next point can be added.
- Tube - In the Length and Width boxes, specify the minimum distance (based on a rectangular tolerance) from the last point that the next point can be added. Polylines are drawn in 2D, so this is not a 3D filter. The rectangle is positioned based on the prior two points on the line. After positioning the rectangle, any digitized point that lies within the rectangle is ignored. To be accepted, a point must lie beyond the end of the rectangle, or outside of either of its edges, or both.
Tip: Start with a filter radius/length of 3 feet/1 meter. Then adjust the tolerance up or down depending on your needs.
Note: If you start a new polyline, the same filter settings are used until you change them.
- Click in the Next points box.
- Pick individual points on your paper plans with the digitizer puck to create a simple polyline, or pick the first point of the polyline, hold down the digitizer button, and move along the path of the AOI boundary. At the end of the polyline, release the button. Points are created at a regular interval, based on the tolerances set in Filter Settings.
Note: The polyline is closed by default, so pick points in an order that will not create overlapping lines.
Note: While in the Next points box, you can press [Backspace] to undo the last segment that was created. - Press [Enter] or click New to start a new polyline. The polyline that you just created is added to the current AOI. The default name suggested for the new polyline is made unique by automatically adding a numeric suffix to the name of the previously created boundary or by incrementing the numeric suffix used by in previous name, if applicable, and the focus returns to the Next Points box.
- To add existing boundary lines to the AOI, click in the Closed lines to add or remove box under Boundary Selection.
- In a graphic view, pick one or more closed lines, such as a boundary, that encompass an area that interests you for takeoff reporting. Alternately, you can select boundaries in the Project Explorer or the closed lines in the Selection Explorer, or click Options and choose a selection method from the context menu.
- Click Add to add the selected bounding lines to the selected area of interest. The resulting area is shaded and the results are reported at the bottom of the pane.
Note: If one of the areas you want to select is not surrounded by closed lines, use the Join Lines or Track Region Outline command to enclose it.
- To remove an area that was previously added to the area of interest, select it and click Remove.
- Skip the Boundary Creation group unless you want to Define an Area of Interest Using a Site Improvement.
- Click Close when you are done.
Scenarios:
- If an AOI is composed of a boundary encompassed within another, then a hole is created in the AOI by the interior boundary. The results are shaded accordingly.
- If an AOI is composed of one or more boundaries that overlap or are coincidental, then the areas are both included in the AOI. The results are shaded accordingly.
Dependencies:
- None. Once an AOI has been created from an area-based site improvement, either can be modified or deleted without affecting the other.
