Scanner
The settings in the Scanner panel are available only if you are connected to a scanner.
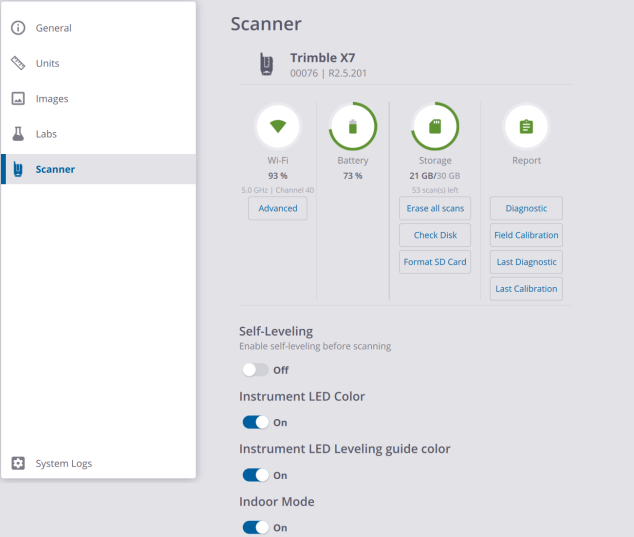
Wi-Fi: This panel displays the signal strength in percentage, the Frequency Range and the Channel in use in case of a wireless connection. Use the Advanced options to change the settings.
ADVANCED: This option lets you customize the Frequency Range, Channel and Region Code to use (see Define Advanced Wi-Fi Settings).
BATTERY: This panel displays the charge level of the battery in the scanner, in percentage and with color codes.
STORAGE: This panel displays the total capacity of the memory card in GB, the remaining storage capacity of the memory card in GB, and the number of allowable scans according to the current scan parameters. The Storage options are enabled only if a connection between the scanner and the controller has been set, and an SD card available in the scanner.
- Erase All Scans: This feature deletes all files in the ScanData folder on the memory card.
- Check Disk: This feature scans through the entire memory card to find and fix problems.
- Format SD Card: This feature deletes all files in the memory card.
When one of the three operations is being processed, the LEDs on the base of the scanner blink in orange.
You cannot undo any of the operations.
DIAGNOSTIC: This feature consists in running a diagnostic to test each of the components in the scanner. The results display on a web page, and can be exported to the PDF or HTML format file (Save) and to the JSON format file (Generate Support File). Optionally, add a logo file to the report (Edit). See Diagnostic.
- Diagnostic: This feature runs a diagnostic on the scanner.
- Last Diagnostic: This feature opens the last run report (if available).
-
A JSON format file is also created in the SD card.
-
The multi-color LEDs on the scanner blink orange when a diagnostic is run.
You cannot run a diagnostic if the battery level of the scanner is below 10%
FIELD CALIBRATION: This feature consists in testing both the Auto-Angular Calibration and Auto-Distance Calibration. The results display on a web page, and can be exported to the PDF, or HTML format file (Save) and to the JSON format file (Generate Support File). Optionally, add a logo file to the report (Edit).
- Field Calibration: This feature runs a field calibration diagnostic on the scanner.
- Last Calibration: This feature opens the last run report (if available).
The multi-color LEDs on the scanner blink orange when a field calibration is run.
You cannot run a field calibration if the battery level of the scanner is below 10%.
SELF-LEVELING: This feature consists in measuring the horizontality (or vertical) of the scanner.
If you disable the Self-Leveling feature, you will not be able to register scans accurately and the scanner will not be able to perform area scanning (see Area).
INSTRUMENT LED COLOR: The feature turns off (or on) all the five LEDs at the base of the scanner.
The feature can be turned off (or on) when scanning.
INSTRUMENT LED LEVELING GUIDE COLOR: This feature helps you level the scanner by indicating which leg on the tripod needs adjusting. See Level a Scanner.
INDOOR MODE: This mode enables productivity gains by reducing the time to acquire each scan. Turn to ON to enable this mode. Note that this mode will:
-
Limit the acquisition range to 30 meters.
-
Reduce the steps taken to calibrate and level each scan, meaning that:
Instead of measuring the Tilt at the beginning and at the end of each scan, the software will only measure at the beginning: a long measurement for the first scan and a short for the others.
The Field Calibration will be done every hour of scanning, and after every scanner power cycle (restart of the scanner), or when the temperature will change significantly by +15 degrees (or by -15 degrees).
-
Disable the following features: Precision Point, Laser Pointer and Area Scan.
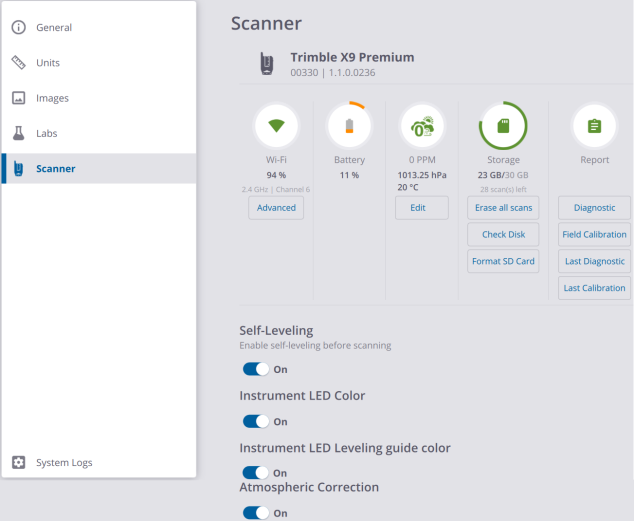
ATMOSPHERIC CORRECTION: The feature applies corrections to the distance measurement - expressed in PPM (Parts Per Million) - according to the atmospheric conditions.
Turning the option off will reset to the default values (0, 1013.25 hPa and 20° Celsius respectively for the PPM, the pressure and the temperature).
INDOOR MODE: This mode is always ON and hidden. The Precision Point, Laser Pointer and Area Scan features are not disabled as with an X7 instrument when you activate the mode.
STORAGE: This panel displays the total capacity of the memory card in GB, the remaining storage capacity of the memory card in GB, and the number of allowable scans according to the current scan parameters. The Storage options are enabled only if a connection between the scanner and the controller has been set, and an SD card available in the scanner.
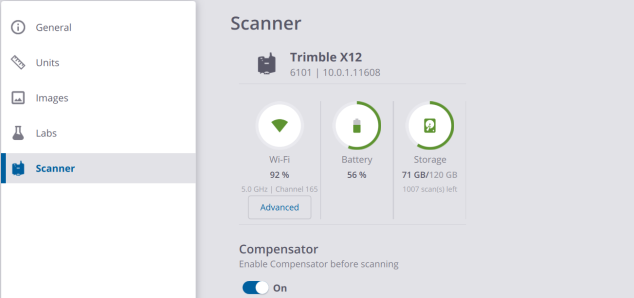
COMPENSATOR: The Compensator is a vertical compensation feature. It automatically level-compensates all 3D points when it is enabled. It is recommended to leave the Compensator on for the Tilt compensation when within a range of ±0.5°. The Compensator can be left on when scanning upside down or tilted at any angle but it will be out of range and the scans will be unleveled. The Compensator should be turned off when scanning on a fluctuating surface like a ship.
A scan acquired with the Compensator disabled will have the label "Leveling Off".
