3D Viewer
Topics in this Chapter
The 3D Viewer in WorksManager Pro has tools for visualizing, analyzing, updating, and managing your site data in 3D. These features enhance contextual understanding and real-time progress monitoring for your construction and civil infrastructure projects. Interact with all of your data in a single place.
The 3D Viewer has functions that enable you to:
-
Access other powerful tools in the:
Prerequisites
-
WorksManager Pro license
-
Imported project data
Toggle Background Map Styles
Display 2D geographic information (street, aerial, and topographic) from Trimble Maps, projected onto a horizontal plane beneath your data. These maps automatically adjust their elevation to be close to your site. Background map imagery automatically drapes onto the 3D terrain model, when available. If no terrain model is visible, draping is done on the flat plane.
-
On the left side, click the
 3D Viewer icon.
 -
To toggle between the
 Satellite map style, which shows aerial imagery, and the
  Basic map style, click the thumbnail shown in the lower left of the view.
 -
Hover over either the
 Basic or
  Satellite thumbnail to see the other options.
 -
Click a thumbnail to switch to a new background map style:
-
 Terrain - Show topographic data.
 -
 Hidden - Hide all background map styles.
 -
 Elevation - Show color-coding based on distance above mean sea level, if elevation data is available. Click the thumbnail again to hide elevation colors. See below.
Show the Elevation Heat Map
While the 3D terrain shown in the Project Data pane aggregates your survey, drone, and machine data into a unified 3D model to create a ‘single-source-of-truth’ that enables you to quickly understand the topography, the model still requires analysis. A standard satellite image draped over the model gives you context, but it does not tell you about elevation.
The Elevation Heat Map transforms your 3D model from a simple geometric representation into a powerful analytical tool. The primary benefit is instant visual insight. You no longer have to guess or manually measure to find the highest and lowest points on your site. At a glance, you can see the flow of water, identify areas that need cut or fill, and get a much clearer perspective on the overall shape of your project. The flexibility to use this in both 3D (for site-wide context) and 2D (for plan view analysis against design lines) makes it a valuable tool for everyone from the project manager in the office to the engineer reviewing plans.
When you're looking at a 3D model or a 2D orthophoto, you cannot immediately see the elevation changes. You know there are slopes and variations, but to understand them, you often have to rely on complex contour lines or use manual spot-check tools to measure individual points. To solve this, a powerful visualization layer is available: the Elevation Heat Map. This feature instantly textures your 3D terrain with a clear, color-coded gradient that represents the site's elevation.
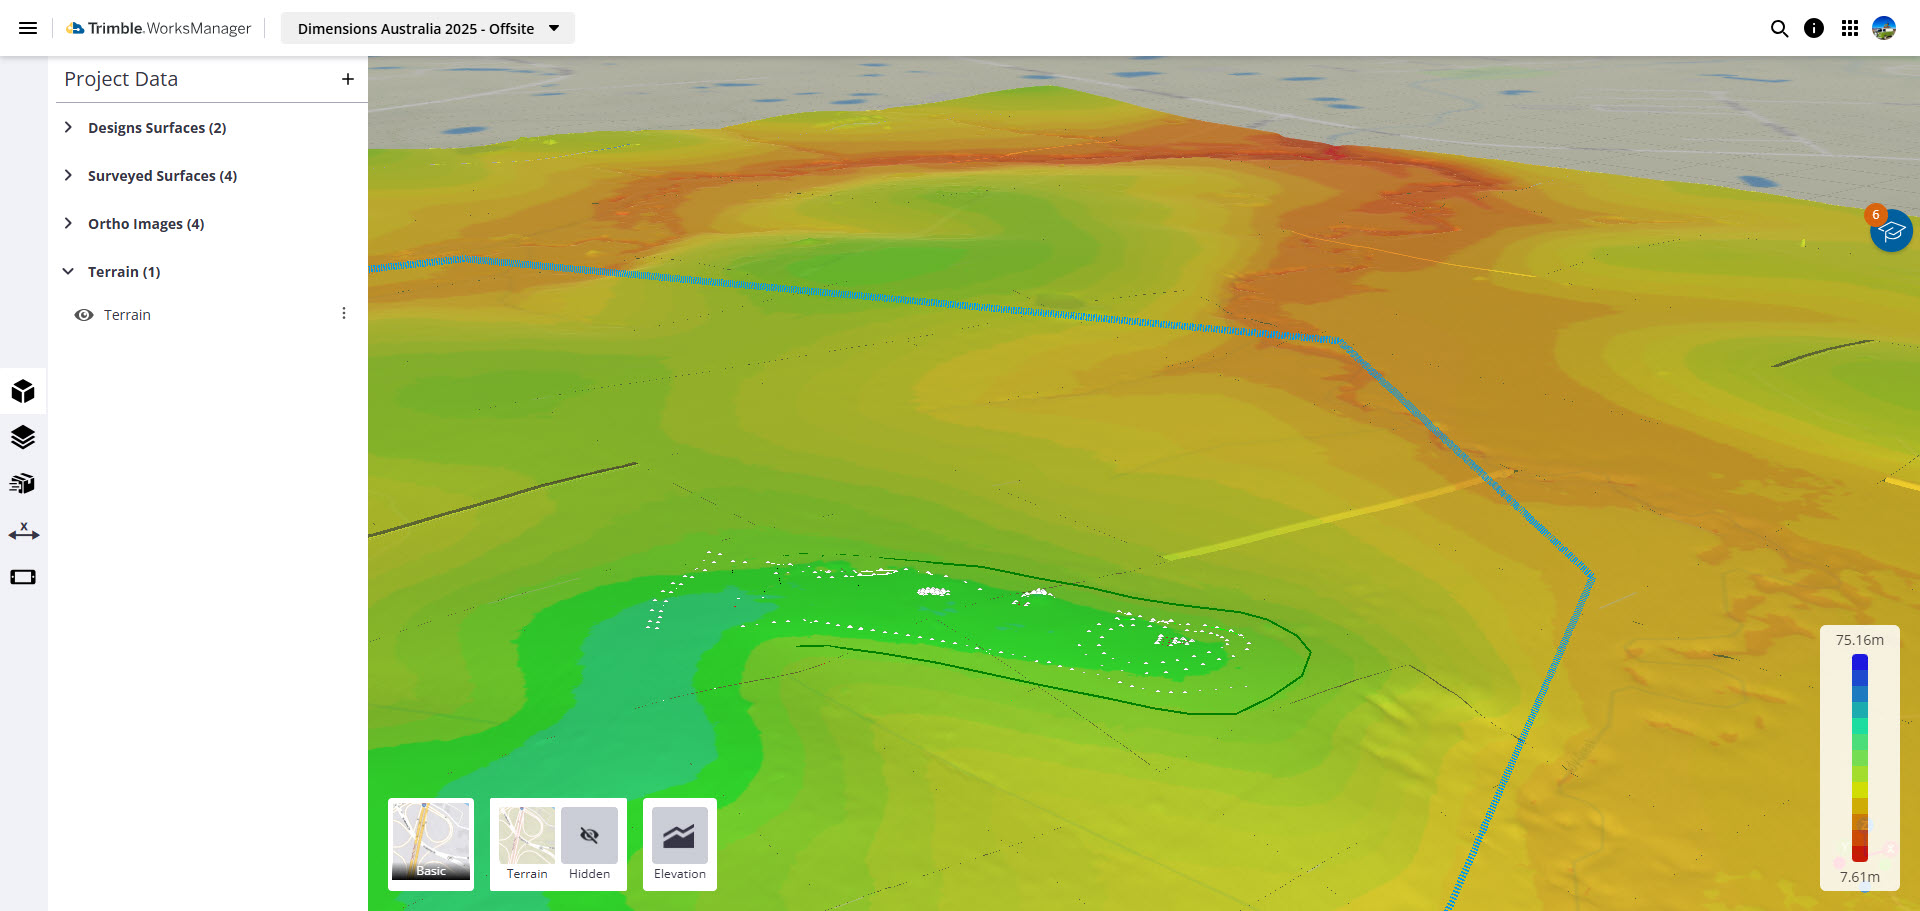
This feature is a toggle within your existing map controls.
-
On the left side, click the
 3D Viewer icon.
 -
Hover over either the
Basic or Satellite thumbnail, and toggle the Elevation thumbnail to the right to show color-coding based on distance above mean sea level.When activated with your 3D terrain model on, this feature drapes a ‘color-per-elevation’ gradient over your entire aggregated surface. A scale bar indicates which colors correspond to which elevations, allowing you to instantly understand the topography.
The heat map is also available as a standalone 2D tool. You can toggle off the 3D Terrain, and the heat map will remain as a geo-referenced 2D overlay on your background map. This allows you to see the elevation data in a traditional plan view, alongside your 2D design line work.
Navigate, Select, and Interrogate Model Objects
Navigate the 3D space using pan, zoom, and orbit controls. This functionality is available on both PC and mobile devices. Select individual objects like points, lines, and surfaces to retrieve object property information, such as length, area, and coordinates.
Navigate and Select in Your Model
Access these functions on the toolbar at the top of the view:
-
 Single selection mode - Pick single objects directly. Choose this mode to use the Rotate and Pan functions described below.
 -
 Area selection mode - Pick one or more objects by:
-
‘windowing’ (clicking-and-dragging a box from left to right; all of the objects entirely within the box are selected) or
-
‘crossing’ (clicking-and-dragging a box from right to left; all of the objects within the box and crossed by the box are selected).
-
-
 /
/  Rotate / Pan - Select a mode from the drop-down. Click-and-drag to rotate around the 3D environment or to move the view in 2D. NOTE: To rotate and pan the view, either use Single selection mode (see above) or deselect both selection modes; Rotate and Pan are not available when you are using Area selection mode.
 -
 Preset views - Choose from standard viewpoints, as well as an Axon (axonometric or projection view), which is a 3D representation on a 2D surface. The Axonometric view shows multiple sides without perspective, thereby maintaining scale and proportion.
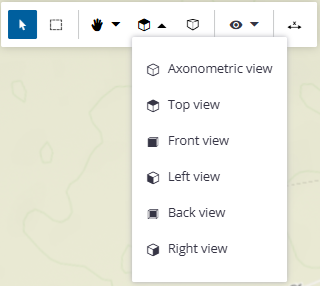
This toolbar also offers these functions, which are described in other topics:
-
 Device/measurement visibility - Click this and check the Devices box to show/hide all machine icons simultaneously. For details, see See Your Device Locations and Status and Make and Save Measurements.
 -
 Measure - Enter measurement mode and use the tools on the Measurement toolbar. See Make and Save Measurements.
-
Autosave - Toggle this on to save each measurement automatically.
-
Done - Click this when you are finished measuring.
-
Interrogate your Model Data
This functionality allows you to review properties of one or more selected objects from various screens in the 3D Viewer. If you have multiple objects selected, their common properties are shown. Any differences in properties are shown as *varies*.
-
Toggle a selection mode on the toolbar at the top of the 3D Viewer.
-
Pick an object, such as a point, line, polygon, or surface in the view.
-
On the floating toolbar at the bottom of the view, click the
 Info icon.
The Properties pane opens on the right side of the view, showing coordinates or dimensions and other properties of the selected object in the pane. -
The pane has two tabs for some selected object types. Click either tab to see:
-
Properties - Shows the object’s layer, color, line style (e.g., solid), line weight, and name.
-
For points, it also shows the X, Y, and Z coordinates.
-
For lines, it can also show 3D distance, 2D horizontal distance, vertical distance, slope, grade, and index ID for each segment.
-
For rectangles, circles, and polylines, it also shows the perimeter length and area in square meters, the coordinates of each vertex, and index ID for each segment
-
For surfaces, it also shows opacity. type (e.g., topo).
-
-
Style - For points, shows the color and symbol, which is editable by clicking the colored dot.
 . Click the
  to open the Properties pane.
Use Snap Modes for Precise Picking
 Snap modes - When in measurement mode, the Snap toolbar appears at the bottom right of the view. Toggle one or more to enter snap modes. See Make and Save Measurements.
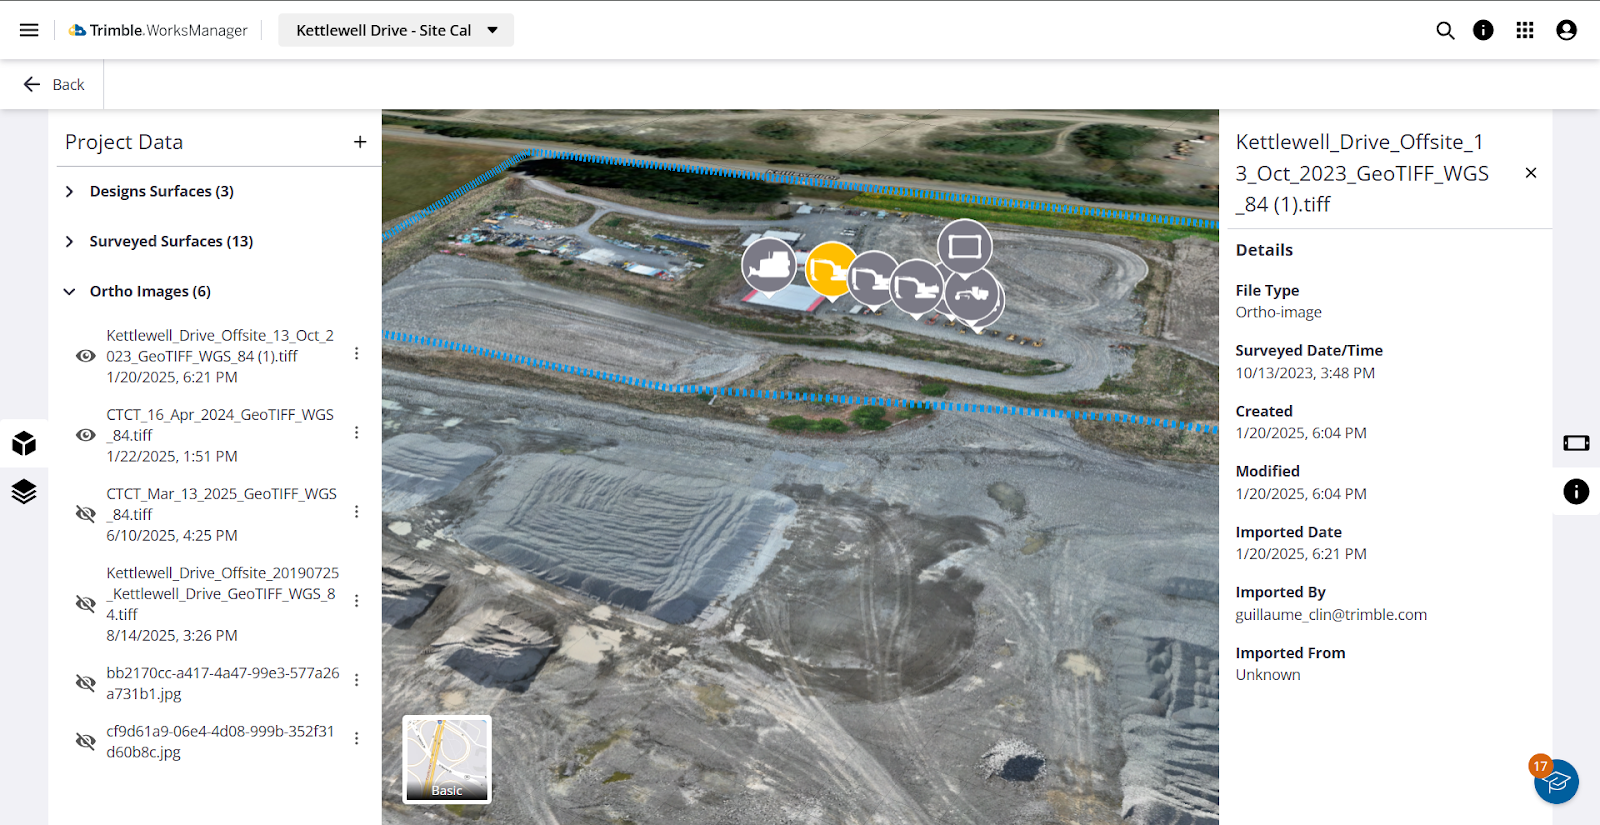
 Visualize and Explore Your Project Data
Click the Project Data icon on the left side to open a pane where you can:
-
Aggregate data from diverse sources
-
Import any supported file type to bring terrain data from various collection methods, along with design specifications, machine control data, project management information, and environmental monitoring data, together into a unified platform.
-
Import georeferenced orthoimages.
-
Bring data in from associated field devices.
-
Import files directly from Trimble Connect.
-
Import third-party drone data
-
-
Visualize and explore these categorized data types:
-
Design surfaces
-
Surveyed surfaces
-
Orthoimages, including drone imagery
-
Terrain (data aggregated from surfaces and orthoimages)
-
-
Enhance visualization - Consolidate terrain data into integrated formats like 3D models and interactive maps for a clearer understanding of your project site's topography.
-
Compare multiple surfaces - Load and simultaneously display multiple surfaces from multiple dates; adjust their color and transparency for visual comparison of overlaps. Change the transparency and base height for any surface.
-
Filter data by date/time - Display terrain models as they appeared on a specified date and time ("as of date"), providing a snapshot of the site's cumulative state up to that point. Edit and filter terrain by date and time ranges.
-
Download - Download surface and terrain data as local files.
-
Review file details - See the file type, creation, modified, and imported dates, and the file owner’s email address.
-
Filter the view - Show only one surface at a time and fit the data to the view.
-
Delete - Remove any surface, imagery, or terrain.
For details, see Visualize and Explore your Project Data.
Terrain Shading and Exaggeration
The 3D Viewer offers shading and terrain exaggeration to improve the visual prominence of 3D objects. You can also apply solid colors and adjust the transparency of individual surfaces. This feature provides greater control over the visualization of 3D models, addressing the common challenge of differentiating between multiple overlapping data surfaces.
 Show/Hide and Filter Layers
Click the Layers icon on the left side to open a pane that shows the layers in each design; you can show/hide them as needed.
-
Filter layers - Quickly find single or related layers using an alphanumeric search.
-
Layer visibility - Show/hide all data on a specific layer.
-
View layer properties - See any layer’s full name, color, line style, and line weight.
-
Select by layer - Pick all the data on a layer.
For details, see Show, Hide, and Filter Layers.
 Manage Design Data Packages
Click the Data Packages icon on the left side to open the pane with categorized data sets, where you can:
-
Review design data by category - Expand the Earthworks, Groundworks, and Survey sections to see which data sets you have for each type.
-
Toggle visibility - Show/hide any data package in the view and when dispatching to a machine.
-
See details - Review details like who modified the design last and its version, surface details like file type, creation, modified, and imported dates, and the file owner’s email address. See the design’s publishing status and to which devices it was published.
-
Edit - Add or modify data to create the next version of the design.
-
Download - A compressed design file (.zip) downloads to C:\Users\<yourname>\Downloads.
-
Delete - Discard the design version. You are prompted to confirm because this design removal cannot be undone.
-
Archive - Remove the design from the Active Designs list.
-
Validate design issues - See if there are conflicts, such as device incompatibilities, in the Info pane.
-
Check designs against a set of rules upon upload to WorksManager, identifying issues like duplicated or disconnected lines.
-
Receive warnings and lists of issues, raised as BCF topics.
-
Manually update issues or eventually use automatic fixes.
-
-
Filter design packages by date - Start with a simple filter with minimal options (e.g., date) and add more criteria as needed.
-
Save filters - Save filters for later use, or save the query/filter itself, to dynamically generate and visualize surfaces again in the future.
For details, see Manage Design Data Packages.
Create and Edit Drafting Objects
-
Create simple geometric objects, such as points, lines, polylines, rectangles, and circles directly within an existing design.
-
Create surfaces from selected objects.
-
Select and edit objects or vertices in the 3D view to correct mistakes, adjust elevation, or shift entire designs.
-
Revise your model using simple drag-and-drop functionality.
-
Precisely place objects using snaps and coordinate entry.
For details, see Create and Edit Drafting Data.
 Make and Save Measurements
Click the Measurements icon on the left side to open the Measurements pane with tools to:
-
Perform measurements - Perform basic coordinate, distance, and slope measurements on your site data.
-
 Point measurement - Pick a location in the view to see the XY coordinate and the Z coordinate label next to the auto-incremented point measurement name in the view. Accurately capture and display coordinates (e.g., northing, easting) and elevation (Z value) at any selected point on the 3D surface or model features.
 -
 Polyline measurement - Pick two or more locations in the view to see the values of each segment in the view. Accurately measure various parameters like 3D distance, horizontal distance, slope distance, and angle measurements within the 3D model.
-
-
Edit and manage points - Drag points in the 3D view to update their coordinates. Measurements can be saved and retrieved for future use.
-
Measure grade/slope along a path - Measure and visualize grade and slope along user-defined polylines in 3D.
-
Measure vertical distances - Determine the vertical elevation difference for each individual segment of a drawn multi-point polyline.
-
Save measurements - Each measurement appears in a list, allowing for future referencing and linking to other items.
For details, see Make and Save Measurements.
 See the Locations and Status of Your Devices
Click the Device Status icon on the left side to open a pane where you can see the map location and latest reported status of each of your devices assigned to this project. Click on any device to get its information. Review where your devices are in relation to the project boundary.
The Device Status pane in the 3D Viewer provides near real-time situational awareness through:
-
Visibility controls - You can manage visual clutter in the map by using a ‘master’ toggle to show/hide all devices or by using individual toggles to show only specific machine types, such as dozers, excavators, or compactors.
-
Real-time status summary - The Site Overview categorizes devices by their connectivity state, such as Connected, Not Connected, or reporting a Warning. Identify any devices/machines that have lost "radio contact" (connectivity).
-
Dynamic color-coding - Device icons on the map are color-coded based on their status, allowing you to quickly identify issues on machines without opening the details of every device.
-
Machine-specific data - When you click a specific machine icon in the 3D Viewer, the pane displays detailed real-time information for that asset, including its direction of travel, current connectivity status, and the design file it is currently using.
For details, see See your Device Locations and Status.
Integrate, Synchronize, and Remotely Access Your Data
The 3D Viewer also incorporates these powerful, general functions:
-
Connected workflows - The system is designed to streamline field-to-office workflows by allowing simple import and direct visualization of data collected by field devices (Trimble Access and Siteworks) into the WorksManager 3D environment.
-
Trimble Connect integration - The platform benefits from Trimble Connect's role as a common data environment (CDE) for project information, enabling model viewing, version control, and integration with other software tools. Full integration with Connect allows for the display of solid models, like bridges and pipework.
-
Synchronize your data with WorksOS - The viewer is synchronized with WorksOS so the data is the same across applications, creating a more connected and efficient workflow. If you are a WorksOS user, any surface you previously imported into your WorksOS project will automatically be available in the 3D Viewer's surface list. When you import a new surface through the 3D Viewer, it will be automatically added to your corresponding WorksOS project. This ensures that your data stays synchronized without any extra steps.
-
Access functions on mobile devices - The 3D Viewer and all of its functions are accessible directly from mobile phones and tablets, allowing you to navigate projects, view designs, toggle layers, and make quick measurements on-site without a PC.
3D Viewer features aim to provide a robust and intuitive 3D visualization and management platform, moving you beyond the limits of 2D and reducing your reliance on disconnected desktop software.
