Capture an Image from the Plan View
Use the Capture Image command to save the contents of the active Plan View as both a georeferenced image (.jpg, .png, .tif, or .gif) and a placemark KML file (.kml) that can be viewed in Google™ Earth. You can capture all of the content displayed in the Plan View, or you can use a plotbox to select the content you want to capture.
Note: A georeferenced image file is actually made up of two files: the image file itself and the world file accompanying it that contains the georeferencing data.
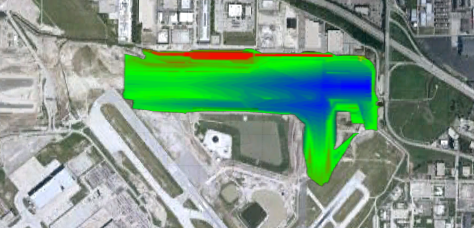
Following is an example of a surface captured from the Plan View and displayed in Google Earth.
Prerequisites:
- License, See the Subscription Plans page. For a license matrix by command, see the License page in the TBC Community. Also see View and manage licensed features.
- Data in the Plan View (the coordinate system must be correct to georeference the image properly)
- Google Earth Pro desktop application installed (if you want to view the KML file in Google Earth Pro)
To capture an image from the Plan View:
- Select Capture Image in CAD > Images.
The Capture Image command pane displays.
By default, the file name for the new capture is "Snapshot" followed by a sequential number. The same name is used for the image file, its related georeference world file, and the Google Earth KML file. The default location for the files is a subfolder named "Snapshots" located in your project folder.
- Optionally, in the File name field, change the name of the image file. Or, click the Browse button located to the right of the field to change the name of the image file, the folder in which it will be stored, and/or its file format extension.
Note: The PNG (.png) and TIFF (.tif) formats produce transparent KML images when viewed in Google Earth. The JPEG (.jpg) and GIF (.gif) formats create opaque (non-transparent) KML images when viewed in Google Earth. Note that white objects (for example, lines, points, point names, and features) can be more difficult to view in a transparent image.
- Optionally, in the Resolution drop-down list, select a different resolution at which the image will be captured.
If you are capturing the contents of the entire Plan View, the resulting image's resolution is the size of the Plan View (excluding the frame) multiplied by the DPI value you select in the Resolution drop-down list. If you are capturing the contents of a plotbox, the resulting image's resolution is the size of the plotbox multiplied by the DPI value you select in the Resolution drop-down list. If you reduce the size of the Plan View or plotbox prior to capturing the image, the file will be smaller in size and lower in resolution. Conversely, if you increase the size of the Plan View or plotbox, the resulting image will be larger in size and higher in resolution. Consider how, and on what device, the resulting image will be displayed when choosing a capture area and resolution.
- Optionally, to capture the contents of a plotbox rather than the entire Plan View, do the following:
- Click the Create Plotbox button located at the top of the Capture Image pane to display the Create Plotbox pane.
- Create the plotbox as described in Create a Plotbox and Print its Contents. Then close the Create Plotbox pane.
- In the Capture Image pane, select the plotbox you want to use in the Select plotbox (optional) drop-down list.
- Click the Apply button.
The newly captured image file name is added to the Image list. You can do any of the following in the list
- Hover your cursor over the file name to display the full path to the file’s location.
- Click the file name to view the image in an external viewer.
- Right-click the file name and select Delete to delete the image file and its related world file and KML file from the project.
- Double-click the row header button
 for any file in the list to open the folder in which the image file, world file, and KML file are stored.
If applicable, you can upload KML files to Trimble Connect. Then you can display the data in Trimble Connect's 3D Viewer. For instructions on viewing KML files in Google Earth, see View Survey Data in Google Earth.
Note: Each captured georeferenced image file and its associated world file are automatically added to the related files list, which is the list of files that will be uploaded to a field device when you export data to the device. To view the Related Files list for the project, click the Related Files icon in the toolbar located at the top of the Capture Image pane.
